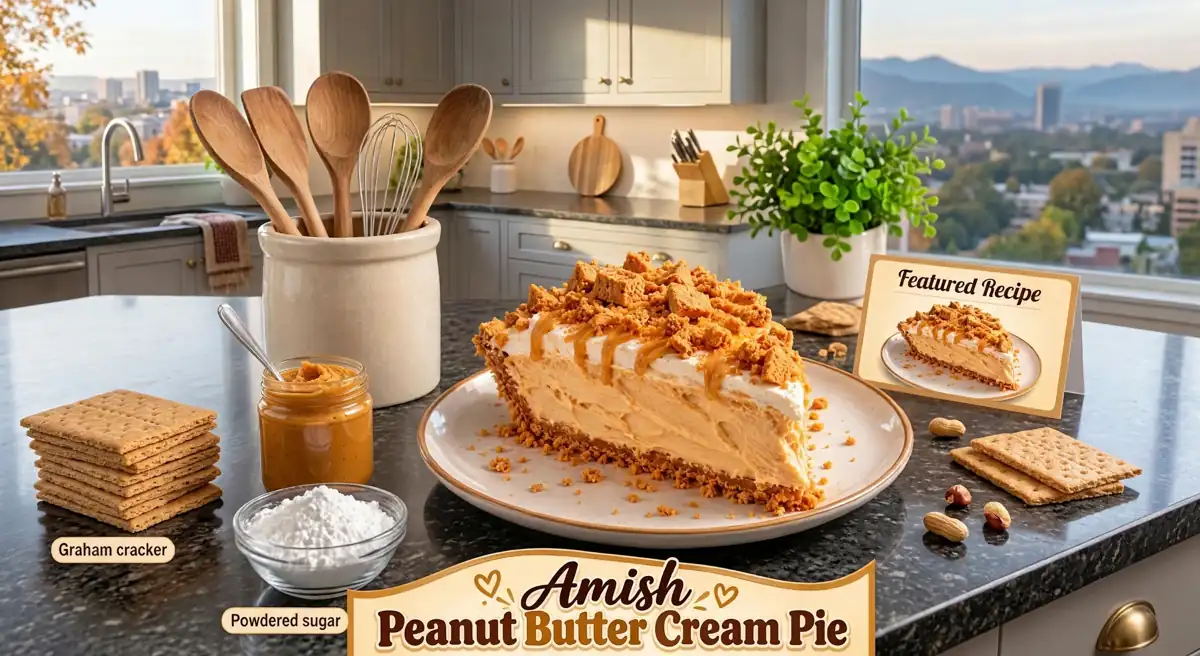
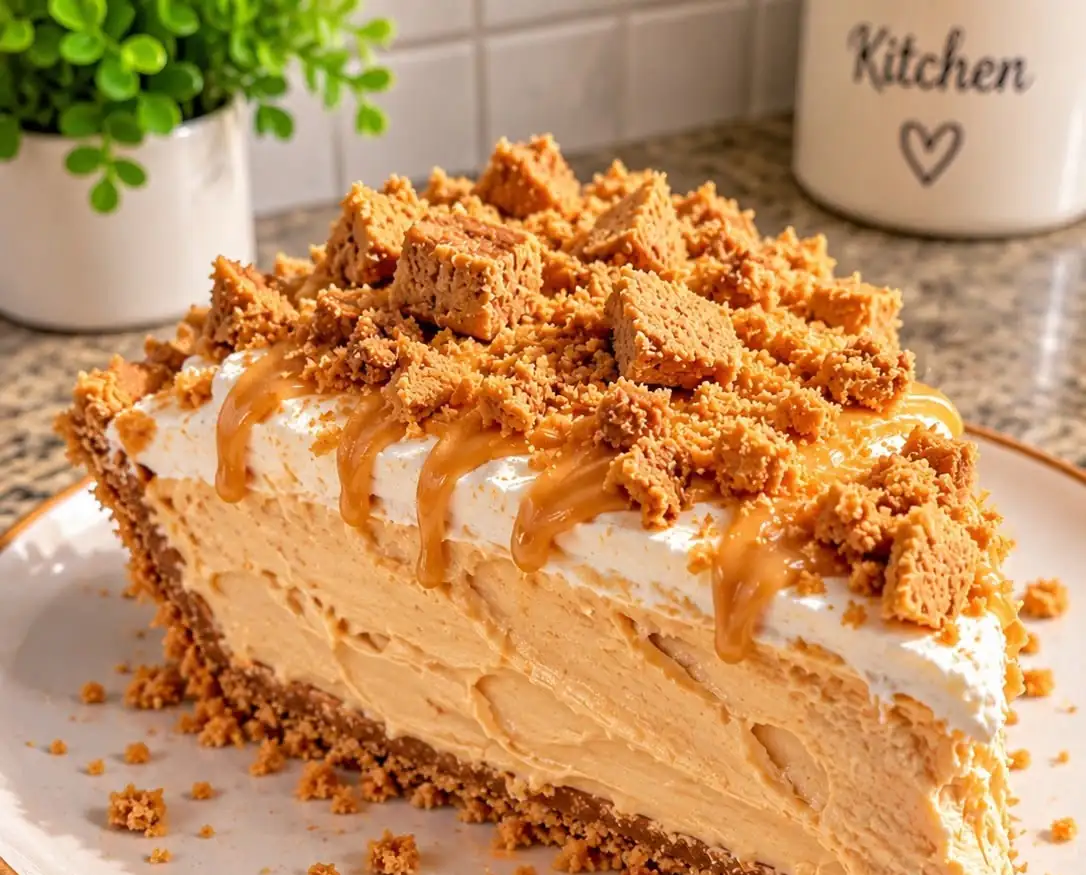
This anti-inflammatory Amish peanut butter cream pie keeps everything people love about the old-fashioned original — the nutty crust, the silky vanilla cream filling, the famous peanut butter crumbles scattered underneath and on top, and the cloud of whipped cream — but rebuilds it with cleaner ingredients that are kinder to your body. Instead of a pre-made graham cracker crust and a full cup of powdered sugar, this version uses a cinnamon-spiced almond flour and walnut crust, natural no-sugar peanut butter, and powdered monk fruit sweetener, so you get the same nostalgic flavor with no refined sugar and a much gentler effect on your blood sugar.
If you have ever had a slice of traditional Amish peanut butter cream pie at a church supper, a country diner, or a Pennsylvania Dutch bakery, you already know why this pie has such a loyal following. What makes an Amish peanut butter pie different from every other peanut butter pie is that the peanut butter never goes into the filling. The filling stays a plain, delicate vanilla custard. The peanut butter is worked into sweet, sandy crumbles that are layered under the custard and showered over the whipped cream, so every bite gives you creamy, crunchy, and nutty all at once.
This cleaner adaptation follows that exact same structure. The swaps are simple, the method is beginner-friendly, and the result slices beautifully after a few hours in the fridge. Whether you are making it for a holiday table, a potluck, or a weekend treat for your family, this is the peanut butter cream pie recipe to keep.
One honest note before we start: this is still a dessert, not a health food. Peanut butter and nuts are naturally calorie-dense, so a slice is satisfying and rich. What makes this version “anti-inflammatory style” is what we leave out and what we add in: no refined sugar, no processed graham crust, no hydrogenated oils — and in their place, omega-3-rich walnuts, fiber-rich almonds, real vanilla, cinnamon, and an optional pinch of golden turmeric in the custard. It is a lighter, cleaner way to enjoy a classic, and that honesty matters more than any label.
Table of Contents
Why You Will Love This Recipe
- True Amish structure: crust, peanut butter crumbles, vanilla custard, and whipped topping, layered exactly the way the original is built.
- No refined sugar: the crumbles and filling are sweetened with monk fruit and allulose instead of powdered and granulated sugar, so there is no sugar crash afterward.
- Gluten-free crust: the almond flour and walnut crust is naturally gluten-free, sturdy enough to slice, and tastes like a cinnamon nut cookie.
- Dairy-free friendly: make the filling with full-fat coconut milk and top the pie with whipped coconut cream for a completely dairy-free dessert.
- Make-ahead perfect: this pie actually improves overnight, which makes it ideal for holidays and gatherings.
- Simple pantry ingredients: no boxed pudding mix, no cream cheese, and nothing you cannot pronounce — just real, whole ingredients.
- That famous crumble texture: sweet, sandy peanut butter crumbles under the custard and over the top give this pie its signature contrast in every forkful.
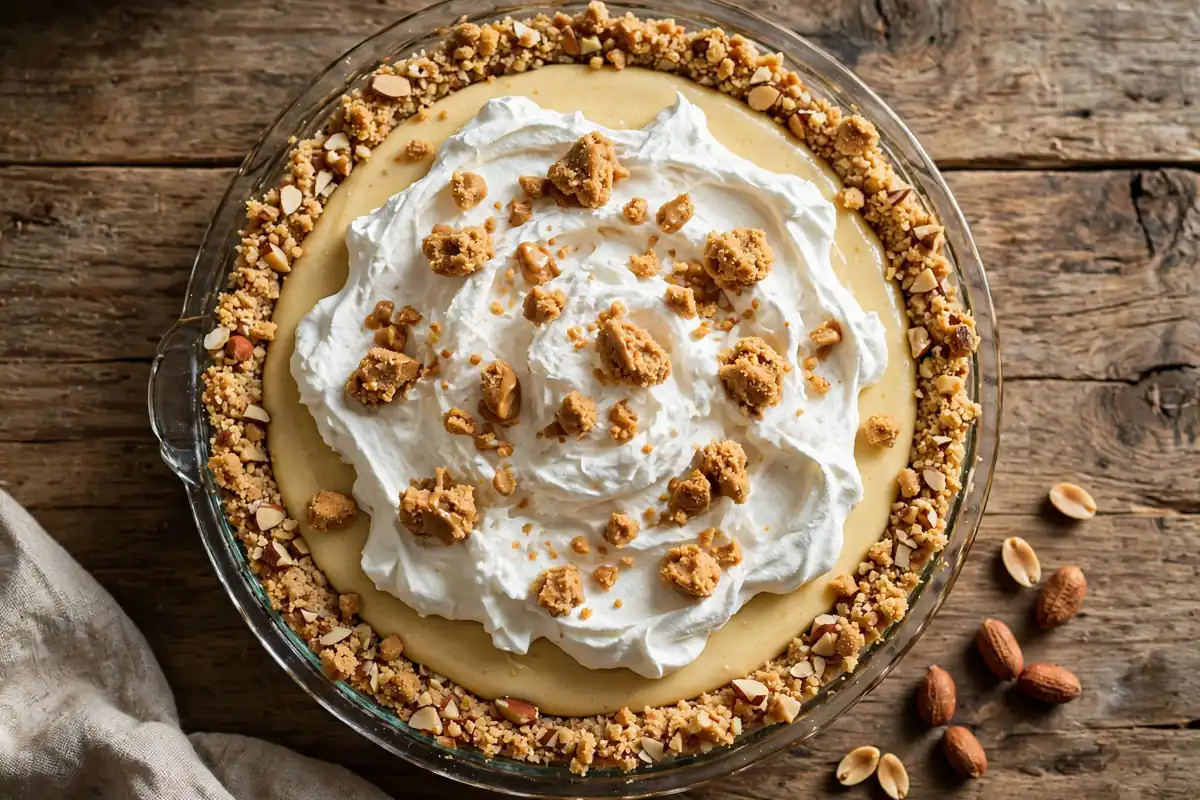
What Makes This Version Anti-Inflammatory Style?
The classic Amish peanut butter cream pie is delicious, but the traditional formula leans heavily on ingredients that work against an anti-inflammatory way of eating: a store-bought graham crust made with refined flour and processed oils, a full cup of powdered sugar in the crumbles, more sugar in the filling, and sometimes a boxed instant pudding mix with additives and dyes.
Here is how this recipe changes that picture, swap by swap:
- Almond flour and walnut crust instead of graham crackers. Almonds bring vitamin E and fiber, and walnuts are one of the best plant sources of ALA omega-3 fatty acids — the fats most associated with a balanced inflammatory response.
- Natural peanut butter instead of conventional. Look for a jar with just peanuts and salt. You skip the hydrogenated oils and added sugar found in many conventional spreads.
- Powdered monk fruit or allulose instead of powdered sugar. These sweeteners deliver the fine, melt-in texture the crumbles need without refined sugar and without spiking blood glucose the way sugar does.
- Real stovetop custard instead of instant pudding mix. Milk, egg yolks, arrowroot, and vanilla — that is it. Egg yolks add choline and richness, and cooking the custard yourself means no modified starches, colors, or artificial flavors.
- Cinnamon and optional turmeric. Cinnamon adds warmth and natural sweetness perception, and a small pinch of turmeric gives the custard a beautiful golden color. Both spices are staples of anti-inflammatory cooking.
- Whipped coconut cream or Greek yogurt topping. You choose the finish that fits your diet: light and dairy-free, or tangy and protein-rich.
Ingredients With Notes
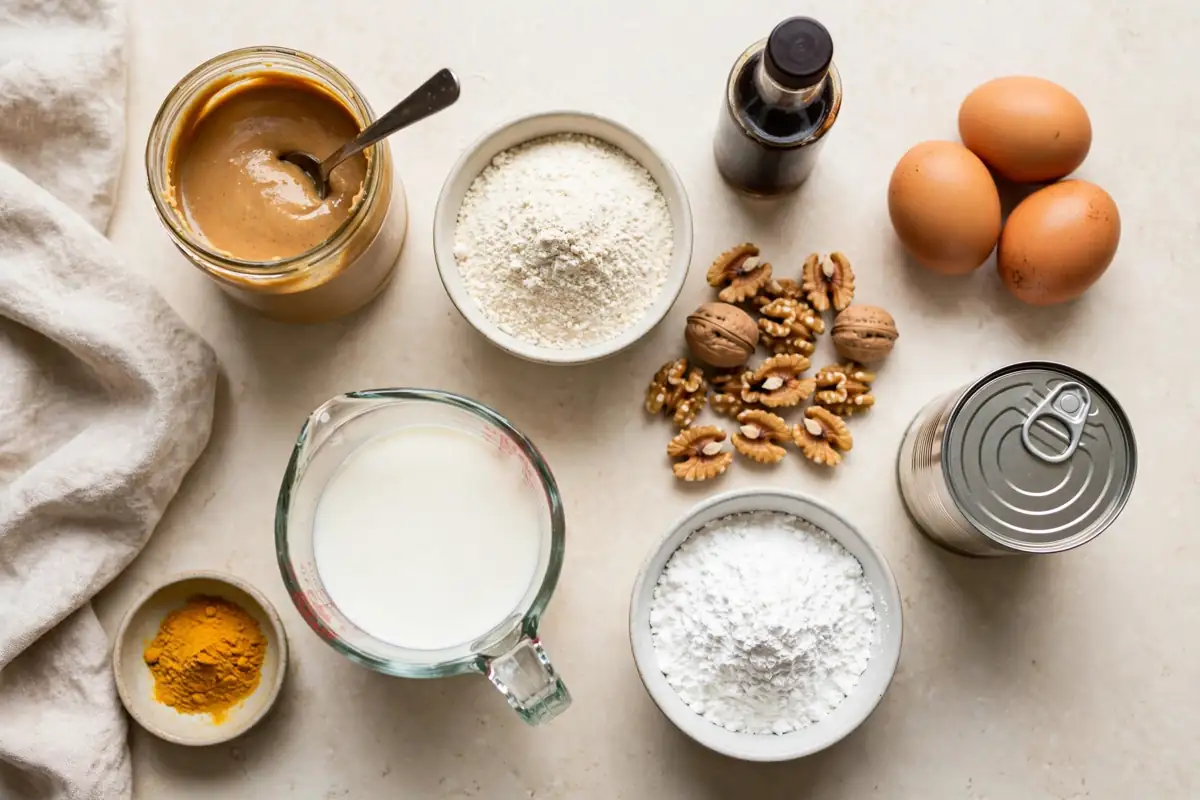
For the Almond Flour and Walnut Crust
- 1½ cups (150 g) fine blanched almond flour — Fine almond flour gives the crust a tender, cookie-like crumb. Almond meal works but produces a coarser, darker crust.
- ½ cup (50 g) finely ground raw walnuts — Pulse walnut halves in a food processor until they resemble coarse sand. Do not over-process or they will turn into walnut butter.
- 3 tablespoons melted coconut oil — Binds the crust and helps it crisp. Melted butter or ghee also works if you are not dairy-free.
- 1 tablespoon powdered monk fruit or allulose sweetener — Just enough to take the raw edge off the nuts. Coconut sugar is a less-processed alternative if you prefer to avoid sugar substitutes, though it does add sugar.
- ½ teaspoon ground cinnamon — Warmth that makes the crust taste like a snickerdoodle.
- Pinch of fine sea salt — Balances the sweetness and sharpens the nutty flavor.
For the Peanut Butter Crumbles
- ¾ cup (192 g) natural creamy peanut butter — The star of the pie. Use a well-stirred natural peanut butter with no added sugar. Because natural peanut butter is a little runnier than conventional, chill the jar after stirring if your crumbles feel too soft.
- ¾ cup (90 g) powdered monk fruit or allulose sweetener — It must be powdered, not granulated, to get that classic sandy crumble texture. You can blitz granulated monk fruit in a clean spice grinder for 20 seconds to make your own.
- Pinch of fine sea salt — Only if your peanut butter is unsalted.
For the Vanilla Cream Filling
- 2½ cups (600 ml) milk of choice — Whole milk gives the most classic flavor. For a dairy-free pie, use full-fat canned coconut milk, which makes an exceptionally silky custard. Oat milk works too, but the custard will be slightly softer.
- 3 large egg yolks — Yolks give the custard its body, color, and that old-fashioned richness. Save the whites for an omelet or meringue.
- ¼ cup (48 g) granulated monk fruit or allulose sweetener — Sweetens the custard gently. The filling should taste delicately sweet, not candy-sweet, because the crumbles bring concentrated sweetness.
- ⅓ cup (40 g) arrowroot starch — Thickens the custard and keeps it gluten-free. Cornstarch is a one-to-one substitute and sets a touch firmer.
- 1 tablespoon coconut oil or butter — Whisked in at the end for gloss and a smooth mouthfeel.
- 2 teaspoons pure vanilla extract — Use real vanilla; the filling is simple, so the vanilla carries the flavor.
- ¼ teaspoon ground turmeric (optional) — Adds a warm golden color that makes the custard look extra rich. You will not taste it at this amount. A tiny pinch of black pepper is sometimes added with turmeric in anti-inflammatory cooking, but it is entirely optional here.
- ¼ teaspoon fine sea salt — Essential for balancing the custard.
For the Whipped Topping
- 1 cup chilled coconut cream — Chill a can of full-fat coconut milk or coconut cream overnight and scoop off the solid cream. Alternatively, use 1 cup cold heavy whipping cream.
- 1 tablespoon powdered monk fruit or allulose sweetener
- ½ teaspoon pure vanilla extract
Greek yogurt topping option: fold ½ cup of whipped cream (dairy or coconut) into ½ cup thick Greek yogurt with the sweetener and vanilla for a lighter, tangier finish with extra protein.
Substitutions and Swaps
- Nut-free crust: Replace the almond flour and walnuts with 2 cups of gluten-free oat flour or finely ground sunflower seeds, and swap the peanut butter crumbles for sunflower seed butter crumbles. The flavor changes, but the structure stays the same.
- No sugar substitutes: If you prefer to bake with unrefined sugars only, use powdered coconut sugar in the crumbles and coconut sugar in the custard. The pie will no longer be refined-sugar-free, but it remains a cleaner option than the classic.
- Classic version (the way the reference photo’s banner describes it): Use 1 pre-made 9-inch graham cracker crust, make the crumbles with 1 cup creamy peanut butter and 1 cup powdered sugar, and sweeten the custard with ⅔ cup granulated sugar. This is the traditional pie — wonderful for a special occasion, just much higher in refined sugar and calories.
- Cornstarch instead of arrowroot: Swap one-to-one. Arrowroot gives a slightly silkier, glossier custard and is the better choice for a fully grain-free pie.
- Different nut butters: Almond butter and cashew butter both make lovely crumbles. Cashew butter crumbles are milder and sweeter; almond butter keeps the recipe closer to its anti-inflammatory goals.
- Chocolate twist: Add 2 tablespoons of unsweetened cocoa powder to the crumbles for a chocolate-peanut butter crumble, or drizzle the finished pie with melted dark chocolate (70% or higher).
Equipment You Will Need
- 9-inch pie dish (glass or ceramic)
- Food processor or mini chopper (for the walnuts)
- Mixing bowls
- Medium heavy-bottomed saucepan
- Whisk and heatproof spatula
- Fine-mesh strainer (optional, for an extra-smooth custard)
- Hand mixer or stand mixer (for the whipped topping)
- Plastic wrap (for covering the custard surface)
Step-by-Step Instructions
Step 1: Make and Bake the Crust
Preheat your oven to 325°F (165°C). In a medium bowl, stir together the almond flour, ground walnuts, powdered sweetener, cinnamon, and salt. Pour in the melted coconut oil and mix with a fork until the mixture looks like wet sand and holds together when pinched. Tip the mixture into your pie dish and press it firmly and evenly across the bottom and up the sides — the flat bottom of a measuring cup makes this easy and gives you a compact, even layer. Bake for 10 to 12 minutes, until the edges are just turning golden and the crust smells toasty. Cool completely on a wire rack. A warm crust will melt the bottom crumbles, so do not rush this step.
No-bake option: Skip the oven and freeze the pressed crust for 30 minutes instead. It will be slightly more delicate when sliced but works well in summer.
Step 2: Make the Peanut Butter Crumbles
While the crust cools, add the natural peanut butter, powdered sweetener, and salt (if using) to a bowl. Work the mixture with a fork, pressing and stirring, until it transforms from a paste into small, sandy crumbles with some pea-sized pieces. If the mixture stays pasty — which can happen with a very runny natural peanut butter — add more powdered sweetener 1 tablespoon at a time, or chill the bowl for 10 minutes and crumble again. Divide the crumbles into two portions: a scant half for the bottom of the pie and the rest for the top.
Step 3: Cook the Vanilla Cream Filling
In a medium saucepan, whisk together the granulated sweetener, arrowroot starch, turmeric (if using), and salt. Slowly pour in the milk while whisking so no lumps form. In a small bowl, whisk the egg yolks until smooth. Place the saucepan over medium heat and cook, whisking constantly and scraping the corners of the pan, for 6 to 8 minutes, until the mixture thickens noticeably and begins to steam. Slowly ladle about half a cup of the hot milk mixture into the yolks, whisking the whole time — this tempers the yolks so they do not scramble. Pour the warmed yolks back into the saucepan and continue cooking for 1 to 2 more minutes, until the custard is thick enough to coat the back of a spoon and large bubbles slowly break the surface. Remove from the heat and whisk in the coconut oil and vanilla. For the silkiest result, pour the custard through a fine-mesh strainer into a clean bowl.
Step 4: Assemble the Pie
Sprinkle the smaller portion of peanut butter crumbles evenly over the bottom of the cooled crust. Pour the warm custard over the crumbles and smooth the top with a spatula. Press a piece of plastic wrap directly onto the surface of the custard — this prevents a skin from forming — and refrigerate for at least 4 hours, or overnight, until fully set and cold all the way through.
Step 5: Whip the Topping and Finish
When you are ready to serve, whip the chilled coconut cream (or heavy cream) with the powdered sweetener and vanilla until soft, billowy peaks form. Spread or pipe the whipped topping over the chilled custard, then shower the remaining peanut butter crumbles generously over the top, right to the edges. For the prettiest finish — the one in the photos — warm 1 tablespoon of peanut butter until pourable and drizzle it over the crumbles. Slice with a sharp knife wiped clean between cuts, and serve cold.
Pro Tips for the Best Peanut Butter Cream Pie
- Stir natural peanut butter completely, then chill it. The oil on top of a natural jar must be fully incorporated, or your crumbles will be greasy in some bites and dry in others.
- Powdered sweetener is non-negotiable for crumbles. Granulated sweetener stays gritty and never gives you that classic sandy texture.
- Whisk the custard constantly. Arrowroot and egg yolks can scorch or scramble in seconds if the pan sits unattended. Constant whisking is the whole secret to a smooth vanilla cream filling.
- Do not boil the custard hard. A gentle bubble is enough. A rolling boil can thin arrowroot-thickened custard and give the eggs a scrambled flavor.
- Chill time is an ingredient. Four hours is the minimum; overnight is better. A fully chilled pie slices into clean wedges with distinct layers.
- Keep the top crumbles dry. Add them just before serving so they stay crumbly instead of softening into the whipped cream.
- Warm the knife for clean slices. Run the knife under hot water and wipe it dry between cuts for bakery-style wedges.
Variations to Try
- Chocolate Peanut Butter Cream Pie: Add 2 tablespoons cocoa powder to the crumble mixture and a layer of chocolate ganache (melted dark chocolate plus a splash of coconut milk) over the crust before adding the bottom crumbles.
- Peanut Butter Banana Cream Pie: Layer thin banana slices over the bottom crumbles before pouring in the custard for a banana cream pie hybrid.
- Salted Peanut Butter Pie: Finish the top with a tiny pinch of flaky sea salt. The contrast with the sweet crumbles is outstanding.
- Mini Mason Jar Pies: Layer crust crumbs, crumbles, custard, and whipped topping in small jars for individual servings that are perfect for parties and portion control.
- Mocha Custard: Replace ½ cup of the milk with strong cooled coffee and add a teaspoon of espresso powder to the custard for a subtle mocha note.
How to Serve
Serve this pie cold, straight from the refrigerator, in modest wedges — it is rich, and a smaller slice with a cup of coffee or unsweetened tea is deeply satisfying. For a dinner party, garnish each plate with a few extra crumbles, a drizzle of warm peanut butter, or a small handful of fresh raspberries, whose tartness cuts beautifully through the creamy filling. The pie is at its best within the first 48 hours, when the crumbles on top still have their texture.
Storage and Make-Ahead
- Refrigerator: Cover the pie loosely (or store slices in an airtight container) and refrigerate for up to 4 days. The bottom crumbles will soften over time but the flavor stays wonderful.
- Make ahead: Bake the crust and cook the custard up to 2 days in advance; assemble the pie the day before serving and add the whipped topping and top crumbles within a few hours of serving.
- Freezer: Freeze the assembled pie without the whipped topping for up to 1 month. Thaw overnight in the refrigerator, then top and serve. The custard may weep very slightly after thawing, but the pie is still delicious.
Nutrition Information
The following is an estimate for 1 slice (one-eighth of the pie), calculated from the exact ingredients above using whole milk in the filling and whipped coconut cream on top. It is an estimate, not a lab analysis, and it will shift with your ingredient choices: making the filling with full-fat canned coconut milk adds roughly 40 calories per slice, while the Greek yogurt topping lowers the fat and raises the protein.
- Calories: approximately 488
- Total fat: 42 g
- Saturated fat: 14 g
- Total carbohydrates: 19 g
- Fiber: 4 g
- Net carbs: approximately 15 g
- Total sugars: 5 g (naturally occurring, from the milk and peanuts)
- Added sugar: 0 g
- Protein: 15 g
For comparison, a slice of the classic version — graham crust, 1 cup powdered sugar in the crumbles, and granulated sugar in the filling — typically lands around 580 calories with roughly 38 grams of sugar per slice. This cleaner version saves you most of that sugar while keeping the pie unmistakably rich and satisfying, which is exactly the point of a smart swap.
Frequently Asked Questions
1. What makes a peanut butter pie “Amish”?
The Amish style keeps the peanut butter out of the filling entirely. The filling is a plain vanilla custard or cream, and all of the peanut butter flavor comes from sweet peanut butter crumbles layered under the filling and sprinkled over the top. Most other peanut butter pies beat the peanut butter directly into a cream cheese or pudding filling, which gives a completely different texture and flavor.
2. Can I use a store-bought graham cracker crust?
Yes — that is exactly how the classic version is made, and it is a fine shortcut when time is short. Just know that a pre-made graham crust is made with refined flour and sugar, so the pie will no longer match the anti-inflammatory, gluten-free goals of this recipe. If you buy one, choose the baked version and let the custard cool for 10 minutes before pouring it in so the crust stays crisp.
3. Why are my peanut butter crumbles pasty instead of crumbly?
Natural peanut butter varies a lot in oiliness. If your mixture looks like a paste, your peanut butter is on the runny side: add powdered sweetener 1 tablespoon at a time, or chill the bowl for 10 to 15 minutes and work the mixture again with a fork. Using a well-stirred, chilled jar of peanut butter prevents the problem in the first place.
4. Can I make this pie completely dairy-free and vegan?
Dairy-free is easy: use full-fat coconut milk in the custard and whipped coconut cream on top. A fully vegan version is harder, because the egg yolks are what set the custard. You can experiment with extra arrowroot (increase to ½ cup) and a pinch of agar, but the texture will be softer and less rich, so treat it as a different, pudding-style pie rather than a true swap.
5. How long does Amish peanut butter cream pie need to chill?
At least 4 hours, and overnight is genuinely better. The custard needs to be cold all the way through to slice cleanly, and the flavors meld as it rests. If you are short on time, 1 hour in the freezer followed by 2 hours in the fridge gets you most of the way there.
6. Can I freeze peanut butter cream pie?
Yes, with one adjustment: freeze it before adding the whipped topping, wrapped tightly, for up to 1 month. Thaw it overnight in the refrigerator, then add fresh whipped topping and the reserved top crumbles before serving. Custards thickened with arrowroot can weep a tiny amount after thawing, but a night in the fridge firms the slices back up.
Final Thoughts
This anti-inflammatory Amish peanut butter cream pie proves that cleaning up a beloved classic does not mean giving up what makes it special. You still get the toasty nut crust, the silky vanilla custard, the billowy whipped top, and those irresistible peanut butter crumbles in every single bite — just built from whole ingredients, with no refined sugar and no processed shortcuts. Make it once for a holiday or a Sunday dinner, and do not be surprised when it becomes the most requested pie in your house. If you make it, leave a comment and a star rating below, and pin it for later — your fellow peanut butter lovers will thank you.
Printable Recipe Card
Anti-Inflammatory Amish Peanut Butter Cream Pie
Prep Time: 30 minutes Cook Time: 20 minutes Chill Time: 4 hours Total Time: 4 hours 50 minutes Yield: 1 (9-inch) pie, 8 servings Cuisine: American, Amish-inspired Category: Dessert
Description: A cleaner take on the old-fashioned classic: a cinnamon almond flour and walnut crust, a silky stovetop vanilla custard, and sweet peanut butter crumbles layered underneath and on top, finished with whipped coconut cream. No refined sugar, gluten-free, and dairy-free friendly.
Ingredients
Crust – 1½ cups (150 g) fine blanched almond flour – ½ cup (50 g) finely ground raw walnuts – 3 tablespoons melted coconut oil – 1 tablespoon powdered monk fruit or allulose sweetener – ½ teaspoon ground cinnamon – Pinch of fine sea salt
Peanut Butter Crumbles – ¾ cup (192 g) natural creamy peanut butter, no added sugar – ¾ cup (90 g) powdered monk fruit or allulose sweetener – Pinch of fine sea salt (if peanut butter is unsalted)
Vanilla Cream Filling – 2½ cups (600 ml) milk of choice (whole milk or full-fat coconut milk) – 3 large egg yolks – ¼ cup (48 g) granulated monk fruit or allulose sweetener – ⅓ cup (40 g) arrowroot starch (or cornstarch) – 1 tablespoon coconut oil or butter – 2 teaspoons pure vanilla extract – ¼ teaspoon ground turmeric (optional, for golden color) – ¼ teaspoon fine sea salt
Whipped Topping – 1 cup chilled coconut cream (or heavy whipping cream) – 1 tablespoon powdered monk fruit or allulose sweetener – ½ teaspoon pure vanilla extract
Instructions
- Crust: Preheat oven to 325°F (165°C). Mix the almond flour, ground walnuts, sweetener, cinnamon, and salt. Stir in the melted coconut oil until the mixture resembles wet sand. Press firmly into a 9-inch pie dish. Bake 10 to 12 minutes, until lightly golden. Cool completely. (No-bake option: freeze the pressed crust for 30 minutes instead.)
- Crumbles: Work the peanut butter, powdered sweetener, and salt together with a fork until sandy crumbles form. Set aside a scant half for the bottom of the pie and the rest for the top.
- Custard: Whisk the granulated sweetener, arrowroot, turmeric, and salt in a saucepan. Whisk in the milk. Cook over medium heat, whisking constantly, for 6 to 8 minutes, until thickened and steaming. Whisk half a cup of the hot mixture into the egg yolks to temper them, then return everything to the pan and cook 1 to 2 minutes more, until thick and glossy. Off the heat, whisk in the coconut oil and vanilla. Strain if desired.
- Assemble: Sprinkle the smaller portion of crumbles over the cooled crust. Pour in the warm custard and smooth the top. Cover the surface directly with plastic wrap and chill at least 4 hours or overnight.
- Top and serve: Whip the coconut cream with the sweetener and vanilla to soft peaks. Spread over the chilled pie, shower with the remaining crumbles, and drizzle with a little warmed peanut butter if you like. Slice and serve cold.
Notes
- Chill natural peanut butter after stirring for the driest, sandiest crumbles.
- The classic version uses a pre-made graham cracker crust and powdered sugar in the crumbles; see the Substitutions section for exact amounts.
- Nutrition (per slice, estimated from the ingredients above): approximately 488 calories, 42 g fat, 19 g carbohydrates, 4 g fiber, about 15 g net carbs, 5 g sugar (0 g added), 15 g protein.