Table of Contents
Description
This Keto Boston Cream Pie Cheesecake combines creamy cheesecake, vanilla custard, and chocolate ganache for an easy, decadent low-carb dessert.
Introduction
If you love the classic flavors of Boston cream pie but are trying to keep your carbs low, this Keto Boston Cream Pie Cheesecake is about to become a new favorite. 🍰 It combines everything people love about the traditional dessert—rich vanilla cream, silky chocolate, and a tender cake-like base—but transforms those flavors into a creamy, sugar-free keto cheesecake.
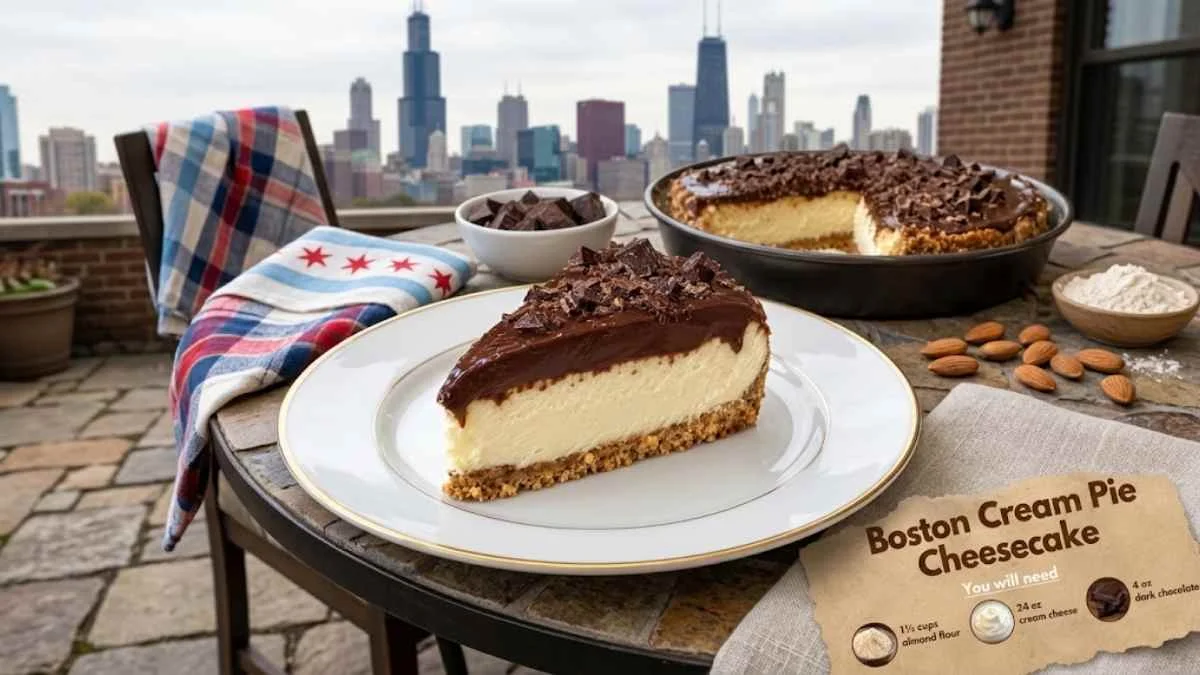
This dessert is especially perfect when you want something impressive without spending hours decorating a complicated cake. The cheesecake has a buttery almond-flour crust, a smooth vanilla filling, a luscious homemade custard layer, and a glossy chocolate topping that makes every slice look bakery-worthy.
I love making this recipe for family dinners, holidays, birthdays, or weekend desserts because it feels incredibly indulgent while still fitting into a low-carb lifestyle. The combination of textures is what really makes it special: slightly crisp crust, creamy cheesecake, velvety vanilla filling, and rich chocolate ganache.
Whether you’re following keto strictly or simply looking for an easy low-carb dessert, this recipe gives you all the classic Boston cream pie flavor in a completely different—and delicious—form.
Recipe Stat Sheet
| Recipe Detail | Information |
|---|---|
| Recipe Name | Keto Boston Cream Pie Cheesecake |
| Category | Dessert |
| Cuisine | American-inspired |
| Prep Time | 30 minutes |
| Bake Time | 55–65 minutes |
| Chill Time | 4–6 hours |
| Total Time | About 6 hours 30 minutes |
| Servings | 12 slices |
| Difficulty | Intermediate |
| Diet | Keto, Low-Carb, Sugar-Free |
| Main Flavor | Vanilla & Chocolate |
| Best Served | Chilled |
Recipe Equipment
Before you start, gather everything you need. Having the equipment ready makes assembling this layered cheesecake much easier.
- 9-inch springform pan
- Mixing bowls
- Electric hand mixer or stand mixer
- Food processor
- Measuring cups and spoons
- Rubber spatula
- Small saucepan
- Whisk
- Baking sheet
- Parchment paper
- Wire cooling rack
- Sharp knife
- Refrigerator
A springform pan is particularly helpful because you can gently release the cheesecake without damaging its creamy edges.
Ingredients
For the Keto Cheesecake Crust
- 1 ½ cups almond flour
- 3 tablespoons powdered erythritol or another keto-friendly powdered sweetener
- ¼ cup unsalted butter, melted
- ½ teaspoon vanilla extract
- Pinch of salt
The almond flour creates a tender, buttery crust while the powdered sweetener adds just enough sweetness without traditional sugar.
For the Cheesecake Filling
- 24 ounces full-fat cream cheese, softened
- ¾ cup powdered keto-friendly sweetener
- 3 large eggs, room temperature
- ½ cup sour cream
- 2 teaspoons vanilla extract
- ¼ cup heavy cream
- 1 tablespoon lemon juice
- 2 tablespoons almond flour
For the Vanilla Cream Layer
- 1 cup heavy cream
- 4 large egg yolks
- ⅓ cup powdered keto-friendly sweetener
- 1 tablespoon almond flour
- 1 teaspoon vanilla extract
- 1 tablespoon unsalted butter
For the Chocolate Ganache
- 4 ounces sugar-free dark chocolate, chopped
- ½ cup heavy cream
- 1 tablespoon unsalted butter
- ½ teaspoon vanilla extract
Choose sugar-free chocolate that fits your preferred carbohydrate target.
Ingredient Notes
Almond Flour
Use finely ground blanched almond flour rather than coarse almond meal. Fine almond flour creates a smoother crust and works better for keto desserts.
Cream Cheese
Full-fat, brick-style cream cheese gives the cheesecake its rich and creamy texture. Let it soften before mixing so the filling doesn’t become lumpy.
Keto Sweetener
Powdered erythritol works well, but you can also use a powdered monk fruit or erythritol blend. Different sweeteners vary in sweetness, so adjust according to the product you use.
Sugar-Free Chocolate
For the topping, use a good-quality sugar-free dark chocolate. The chocolate is one of the most noticeable flavors, so choosing one you genuinely enjoy can make a big difference.
Heavy Cream
Heavy cream makes both the vanilla cream and ganache rich, smooth, and luxurious.
Step-by-Step Instructions
Step 1: Prepare the Pan
Preheat your oven to 325°F (165°C).
Grease a 9-inch springform pan and line the bottom with parchment paper. This makes removing the finished cheesecake much easier.
Step 2: Make the Almond Flour Crust
In a bowl, combine the almond flour, powdered sweetener, salt, vanilla extract, and melted butter.
Stir until the mixture resembles moist, slightly crumbly sand.
Press the mixture firmly into the bottom of the springform pan. Make sure the crust is evenly distributed.
Bake for approximately 10–12 minutes, or until lightly golden around the edges.
Remove it from the oven and allow it to cool while you prepare the filling.
Step 3: Prepare the Cheesecake Filling
Place the softened cream cheese and powdered sweetener in a large mixing bowl.
Beat on medium speed until the mixture becomes smooth, creamy, and completely lump-free.
Add the eggs one at a time, mixing gently after each addition.
Next, add sour cream, heavy cream, vanilla extract, lemon juice, and almond flour.
Mix just until everything is combined. Avoid overmixing because too much air can cause the cheesecake to puff up and crack while baking.
Step 4: Bake the Cheesecake
Pour the creamy cheesecake mixture over the cooled crust.
Smooth the top with a rubber spatula.
Place the pan on a baking sheet and bake for approximately 55–65 minutes.
The center should still have a slight jiggle when you gently move the pan. That’s exactly what you want.
Turn off the oven, crack the door slightly, and let the cheesecake cool inside for about 30 minutes.
Then transfer it to a cooling rack.
Step 5: Make the Vanilla Cream
While the cheesecake cools, prepare the creamy vanilla layer.
In a saucepan, whisk together the heavy cream, egg yolks, powdered sweetener, and almond flour.
Cook over low to medium-low heat, whisking constantly.
As the mixture warms, it will gradually thicken into a smooth custard-like cream.
Do not allow it to boil aggressively.
Once thick enough to coat the back of a spoon, remove it from the heat.
Stir in the vanilla extract and butter until silky and smooth.
Allow the cream to cool slightly.
Step 6: Add the Vanilla Cream Layer
Once the cheesecake has cooled sufficiently, carefully spread the vanilla cream over the top.
Use an offset spatula or the back of a spoon to create an even layer.
Refrigerate the cheesecake for at least 1–2 hours so the cream can firm up before adding the chocolate.
Step 7: Make the Chocolate Ganache
Place the chopped sugar-free chocolate in a heatproof bowl.
Warm the heavy cream in a small saucepan until it is hot but not boiling.
Pour the warm cream over the chocolate and let it sit for about 2 minutes.
Whisk gently until the chocolate melts into a smooth, glossy ganache.
Stir in butter and vanilla extract.
Allow the ganache to cool for several minutes. It should still be pourable but not hot.
Step 8: Finish the Cheesecake
Pour the chocolate ganache over the chilled vanilla cream layer.
Gently spread it toward the edges.
For an elegant finish, leave the top slightly glossy and smooth.
Refrigerate the cheesecake for at least 4 hours, preferably overnight.
This chilling time is important because it allows the layers to firm up and makes slicing much easier.
Pro Tips & Variations
For the creamiest cheesecake, always use room-temperature cream cheese and eggs. Cold ingredients can create lumps and make the batter difficult to blend.
Don’t overmix the cheesecake filling once you’ve added the eggs. Gentle mixing helps prevent excess air and reduces the chance of cracks.
For an extra chocolatey dessert, sprinkle a few sugar-free chocolate shavings over the ganache before serving.
You can also add a tiny pinch of espresso powder to the ganache for a deeper chocolate flavor.
Want a nut-free option? Use a suitable low-carb nut-free crust alternative made with seeds or another keto-friendly flour.
For the best texture, prepare the cheesecake a day ahead and let it chill overnight.
Serving Suggestions
This Keto Boston Cream Pie Cheesecake is delicious straight from the refrigerator.
For an extra-special presentation, top each slice with:
- Sugar-free whipped cream
- Fresh berries
- Sugar-free chocolate curls
- A light dusting of cocoa powder
- Chopped toasted almonds
- A drizzle of extra chocolate ganache
Serve the slices cold and use a sharp knife for clean layers.
For an especially neat presentation, wipe the knife clean between each cut.
Storage Information
Refrigerator
Store leftover cheesecake in an airtight container or cover the springform pan tightly with plastic wrap.
It should keep well in the refrigerator for approximately 3–5 days.
Freezer
Individual slices can be frozen for longer storage.
Wrap each slice tightly in plastic wrap, followed by aluminum foil, and place it in a freezer-safe container.
Freeze for up to 1–2 months for the best quality.
Thawing
Transfer frozen cheesecake to the refrigerator and allow it to thaw slowly overnight.
Avoid thawing it at room temperature for an extended period because the creamy layers can become soft.
Nutrition Facts
Estimated per serving, based on 12 servings:
- Calories: Approximately 430
- Protein: 9–11g
- Fat: 40–42g
- Total Carbohydrates: Approximately 10–12g
- Fiber: Approximately 2–3g
- Estimated Net Carbs: Approximately 7–9g
Nutrition values are estimates and can vary depending on the brands of cream cheese, chocolate, sweetener, and other ingredients used.
Why You’ll Love This Keto Cheesecake
There are plenty of reasons to save this recipe.
It’s incredibly creamy: The combination of cream cheese, sour cream, and heavy cream creates a rich texture.
It’s wonderfully chocolatey: The glossy sugar-free ganache adds a deep chocolate finish without traditional frosting.
It’s low-carb: Almond flour and keto-friendly sweeteners replace several traditional high-carb ingredients.
It’s make-ahead friendly: In fact, chilling overnight can make the cheesecake even easier to slice.
It looks impressive: The contrasting layers make every slice look like something you’d order at a bakery.
Most importantly, it doesn’t feel like you’re eating a “diet dessert.” It tastes like a genuine celebration dessert.
Frequently Asked Questions
Is Boston Cream Pie actually a pie?
Despite its name, traditional Boston cream pie is generally a layered cake filled with custard or cream and topped with chocolate. This keto version transforms those familiar flavors into a cheesecake.
Can I make this cheesecake ahead of time?
Absolutely. Making it the day before serving is actually recommended. The extended chilling time helps the cheesecake become firmer and allows the vanilla and chocolate flavors to blend beautifully.
Can I use a different keto sweetener?
Yes. Powdered monk fruit blends, erythritol blends, and other granulated keto-friendly sweeteners can work. Check the sweetness level of your specific product and adjust accordingly.
How do I prevent cheesecake cracks?
Avoid overmixing the eggs, don’t overbake the cheesecake, and let it cool gradually. The center should have a gentle jiggle when you remove it from the oven.
Is this cheesecake completely sugar-free?
It contains no traditional added sugar when prepared with sugar-free chocolate and a keto-friendly sweetener. However, always check ingredient labels because sugar-free products can vary.
Can I freeze Keto Boston Cream Pie Cheesecake?
Yes. Individual slices freeze well when properly wrapped. Thaw them gradually in the refrigerator before serving.
Final Thoughts
This Keto Boston Cream Pie Cheesecake proves that eating low-carb doesn’t mean giving up rich, satisfying desserts. With its buttery almond-flour crust, creamy cheesecake filling, silky vanilla custard, and glossy chocolate ganache, every bite brings something delicious to the table. 🍫
It’s an excellent dessert for holidays, dinner parties, birthdays, or simply those evenings when you want something special after dinner.
If you try this easy keto cheesecake recipe, let us know how it turned out! Leave a comment, share the recipe with another dessert lover, and save it for your next low-carb celebration.